Making your own knife handle is a rewarding experience that gives you the opportunity to customize and personalize one of your most used tools. Using your own hands and seemingly worthless materials to create something unique gives a sense of accomplishment that cannot be described. Whether you are a hobby knife maker or just want to learn something new, this guide will give you a good starting point and overview of how to make your own knife handle. We cover everything from the necessary materials and tools, to creative ideas and a step-by-step process description. There are many paths to a homemade knife, but here we are going to make it easy to get started. Let's get started!
And remember, you can leave a comment or send us a message if you have any questions or need tips or advice!
Required materials and tools
Before you start, it's a good idea to check that you have all the necessary materials and tools. Here's a list of what you'll need:
Materials
- Knife blades : Explore our wide selection of knife blades for all purposes.
- Shaft material : Choose from wood, antler or synthetic shaft materials to suit your style.
- Epoxy glue : Use epoxy to ensure that the shaft sits securely on the blade.
- Surface treatment : Boiled Vinnie' oil, linseed oil or Danish oil gives a nice finish.
Tool
- Saw (for example, a small handsaw)
- Drill (Completely normal hand-held works)
- File and rasp
- Sandpaper
- Clamps/Tighteners (to hold the workpiece while working or gluing)
- Protective equipment (goggles, gloves, mask)
Tip: You can find many of these tools and materials at Storbua.no. Check out our large selection of knife handle materials, accessories and tools! If you are missing something, let us know!
Make sure you have this in place before you start
Security
- Always wear safety glasses, a mask and gloves to protect yourself from sharp or flying objects, debris, chemicals and dust.
- Work in a well-ventilated area or outdoors to avoid inhaling harmful substances.
Workspace
- Work on a stable table or workbench that doesn't move easily.
- Clear enough space for you to work comfortably.
- Keep the work area clean and tidy to avoid accidents.
Cool ideas for knife handle ideas
Before you begin the process, we encourage you to think about the design of the handle you want to make a knife handle from, but you can also just start sawing and slicing and see where it takes you. It is an artistic process that is about form and function. Start with an inexpensive material that is not too hard, such as birch or other readily available Norwegian woods and a good slicing knife, and you can easily slicing a knife handle with a good shape without too much hassle. If you want to make a plan, here are some ideas to get you started:
- Traditional wood : Use different types of wood for a classic look, such as birch, walnut or oak.
- Shape: Look at existing knives that you like and study the shape of the handles. Do you see any similarities?
- Exotic materials : Try horn, bone, or synthetic/composite materials like micarta , G10 , or epoxy for a unique feel.
- Inlays : Add metal , colored spacers or decorative stones for extra embellishment. See our selection of shaft blanks .
- Decorative pins : Give your knife handle a unique touch with steel or brass pins that are inserted into drilled holes in the handle. These can be used to fasten several types of material together. Also see mosaic pins and motif pins for later, when you want to spice up your handle a bit!
To start, we recommend keeping the project as simple as possible, so you can get started quickly and increase the difficulty and material cost as you gain experience. This means a small knife with simple and inexpensive materials. What you learn now you will carry on, and your skills will grow rapidly with each project you do! But you can of course try making a Katana on your first try, if you really want to!
Knife Handle Template: Step-by-Step Guide
Planning
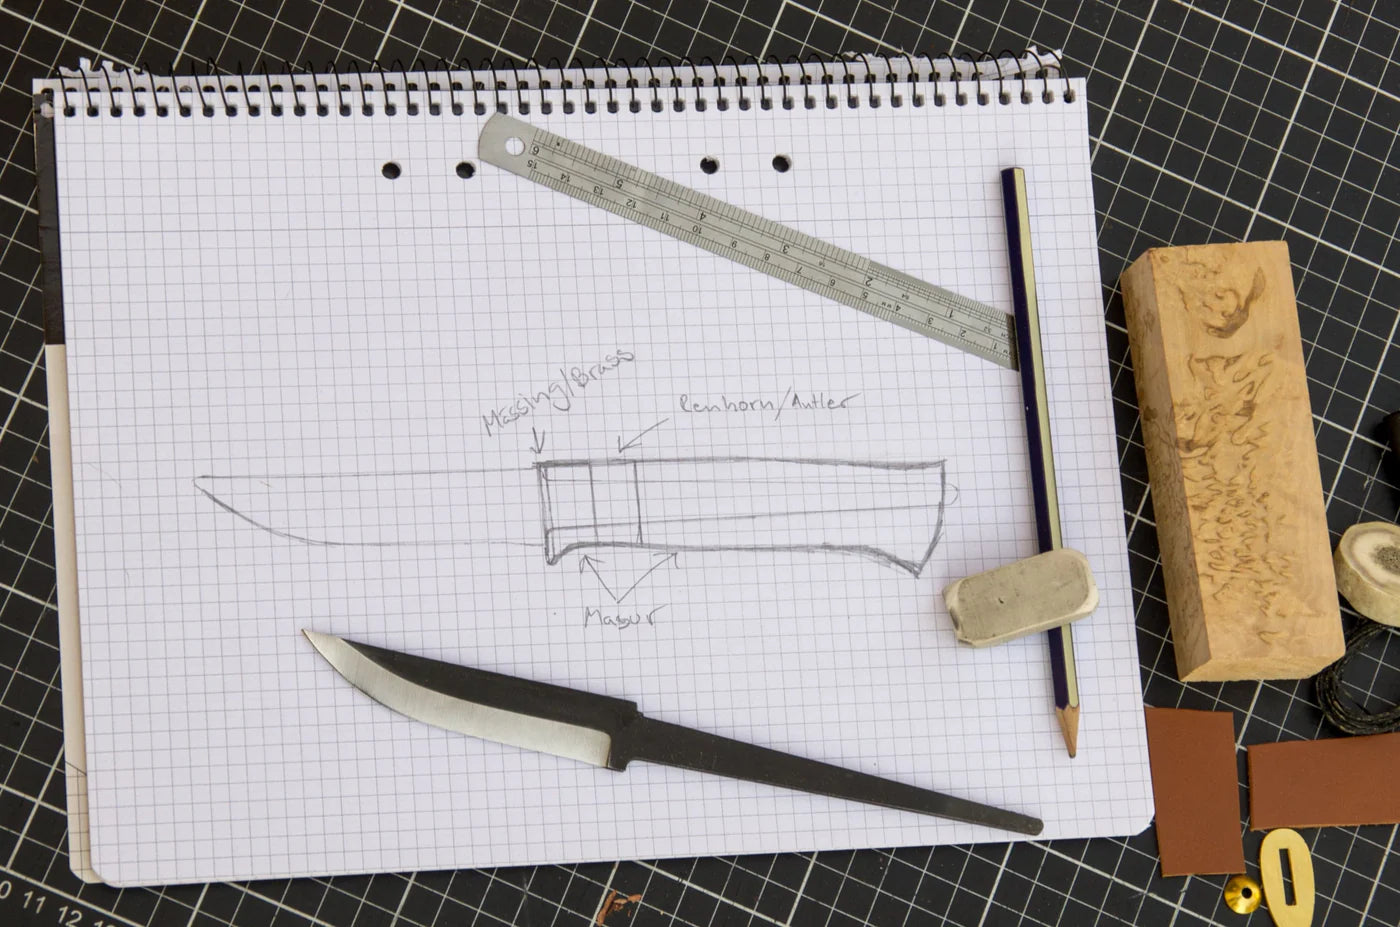
Start by planning how you want the knife handle to look. Make a simple sketch. Place the knife blade you have chosen on a piece of paper and draw the outline of the entire blade, including the tang. The tang is the part of the knife blade that sticks into the handle. Then carefully sketch the shape of the handle with a pencil, line by line. Erase any lines that are wrong and try again until you have something you think will work, and go for it!
TIP: It can often be beneficial to transfer the paper with your newly designed shaft shape to a piece of cardboard that you can quickly cut out and feel how it feels in your hand.
Preparation of materials
- Prepare the handle blank: Depending on the material you have, it will have different shapes. Most often, a knife handle will stay within the standard dimensions of 30x40x120mm, so you can cut the material to the right size for your project.
- Transfer the design: Cut out the template you made on paper and glue it on, or re-sketch the shape on the side of the shaft.
- Prepare for drilling: Take the knife blade and place it along the shaft and mark the position of the pliers by drawing an outline on the shaft. This will show the direction of the hole you will drill.
- Drilling : Drill a hole in the material to fit the tang of the knife blade from the front of the shaft. It is advantageous to use a thin and long drill bit, which is approximately as thick as the tang.
- Adjusting the hole: The drilling leaves a rough-shaped hole that you will then have to file out to make room for the tang. Use a file or what is called a broach (basically a thin jigsaw blade with a shaft) to hollow out space for the knife blade's tang.
Assembling the shaft
- Does the blade fit?: Test that the blade fits well in the handle and that the direction of the knife blade in relation to the finished handle is good. The knife blade should go out perpendicularly, and not bend to one side or the other.
- Gluing : Apply epoxy glue to the pliers and into the hole and insert the pliers into the shaft material. Use clamps to hold everything in place while the glue dries. A good epoxy glue usually takes 8 hours to cure, so it's perfect to get a good night's sleep while it cures.
Shaping and grinding
- Roughing : Use a saw, knife, or rasp to give the shaft its basic shape. Use the design you made on paper as a template or your own hand to know what should be removed from the shaft.
- Fine shaping and polishing : Use sandpaper to round and smooth the shaft, starting with coarse sandpaper (e.g. 60) and moving to finer grits for a smooth finish. Often 320 or 400 grit is good enough before applying the finish. However, to polish something to a mirror-like shine, you should go all the way up to 3000 and then polish more with polish.
Finishing
- Finishing : Apply oil or wax to protect the wood and give it a nice shine. Allow to dry according to the oil/wax instructions. Danish oil and boiled linseed oil are popular options.
Termination
Congratulations, you have now made your own knife handle! We hope you enjoyed it and that this guide has been useful and inspiring. Don't forget to get in touch if you have any questions, and feel free to check out our selection of knife handles, glue, tools and other products on our website. Also follow us on Instagram for more inspiration and share your own projects with us!
PS: Don't give away or sell your first knife. You'll want it later. So keep it as a memento of your early days!
Recommended next steps:
- Check out our selection of knife handle blanks
- Follow us on Instagram and Facebook
- See the rest of our selection !
With these simple steps you can create a unique and personal knife handle that is both functional and aesthetically pleasing. Good luck with your project! Remember that we are available for free sparring, with tips and advice!
1 comment
Khairun Nisa
En annen positiv side ved artikkelen er dens fokus på sikkerhet, som er avgjørende når man arbeider med skarpe verktøy. Ved å inkludere nyttige tips og råd, samt advarsler om potensielle farer, gir artikkelen leseren en trygg og informert tilnærming til prosessen. Det er også verdt å merke seg hvordan artikkelen understreker betydningen av personlig tilpasning, og hvordan man kan gjøre knivskaftet unikt for egne behov og preferanser. Visit us Telkom University Jakarta
Leave a comment
All comments are moderated before being published.
This site is protected by hCaptcha and the hCaptcha Privacy Policy and Terms of Service apply.